![]() Anyone with an SOU computing account can create a Google website!
Anyone with an SOU computing account can create a Google website!
Important to know as you begin—some functions will not work in Internet Explorer (Edge), including accessing New Sites for the first time. We recommend using Firefox or Chrome for best results. In addition to the documentation provided below, we've created some informal video tutorials for getting started in your site at the bottom of the page.
 Please note that Google changes our interface from time to time. Your options may look a bit different from what is shown in the images posted here, but the information in each of these sections is as current as we can keep it.
Thanks for your patience!
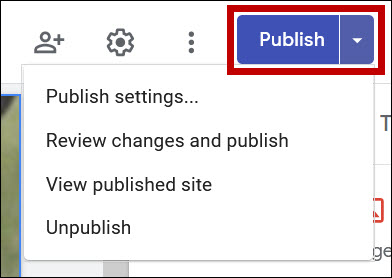 Your site is constantly saved as you work in it, but your changes will only be displayed to visitors after you publish it.
The first time you publish your site, you'll be asked to name it. The name you give it will be in its url. As you publish later versions, you will be able to recover the most recent published version if you wish.
(See Video #3 below.)
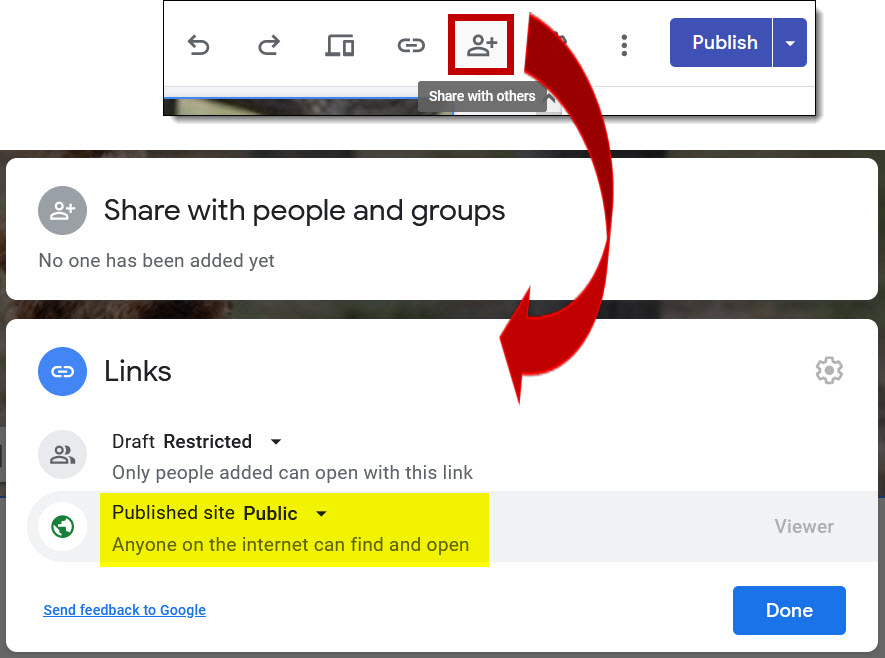 You will be the only person who can access your site until you change your share settings.
- Click on the Share icon in the toolbar at the top of the page.
- You can add an individual as an editor in the top section, but to share your portfolio with others, scroll to the bottom of the dialog box and click on the link labeled Change.
- Leave the Draft section set to Restricted—this prevents any visitors to your site from being able to edit it!
- In the Published site section, choose Public to allow anyone to view your site. (When you publish your site the first time, you can choose whether or not you want your site to be visible to anyone who searches for it or only when you provide the link to someone.)
- Click Done to save your changes.
(See Video #3 below.)
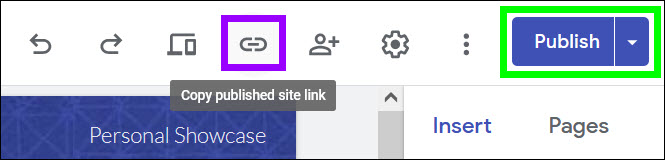 Once you have shared and published your site, you can send the link to potential visitors. Click on the icon in the toolbar at the top of the page to Copy published site link for your site.
Once you have created your site, you'll want to begin populating it with content.
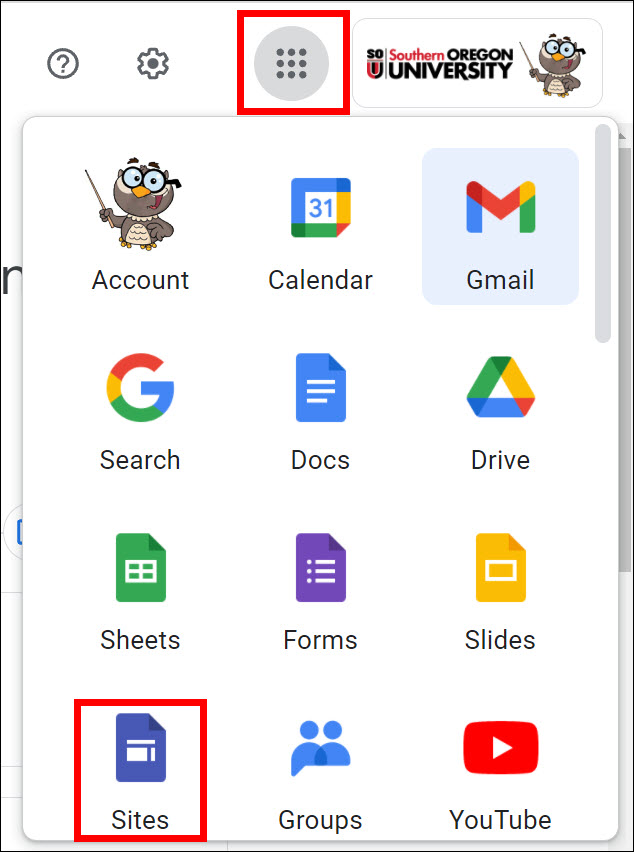 Now that you have a site, how do you find it again?! Go to your campus email and select the Apps icon in the upper right corner. Locate the Sites icon and click on it to open your Sites repository.
 You can quickly change the overall look and feel of your site by adjusting the theme. Click on the Themes tab in the edit panel, then scroll through your options. Don't worry, changing the theme won't change any of your content.
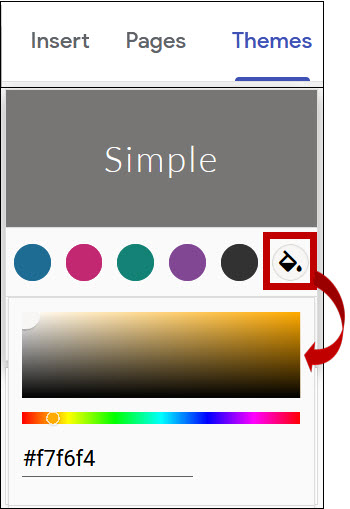
To change the accent color in your site, click on the paint can icon, then use the slider beneath the color swatch to find a color you like.
When you insert a textbox in your site, you can change the background to emphasize your content. To do so, select the textbox, then click on the palette icon in the left margin.
The Regular option will result in text on a white background.
Emphasis 1 changes the white background to light gray:
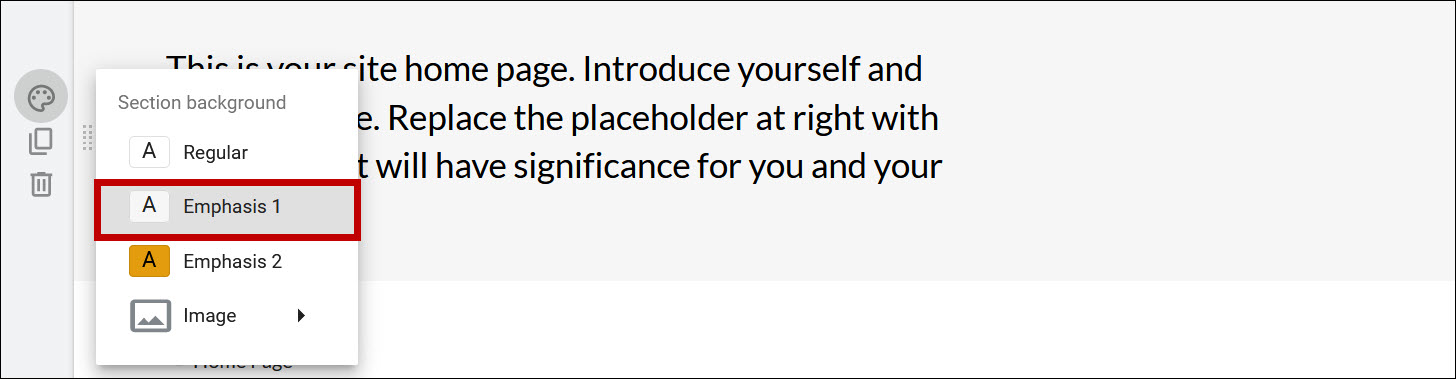
Emphasis 2 changes the background color according to the accent color set in the site theme:

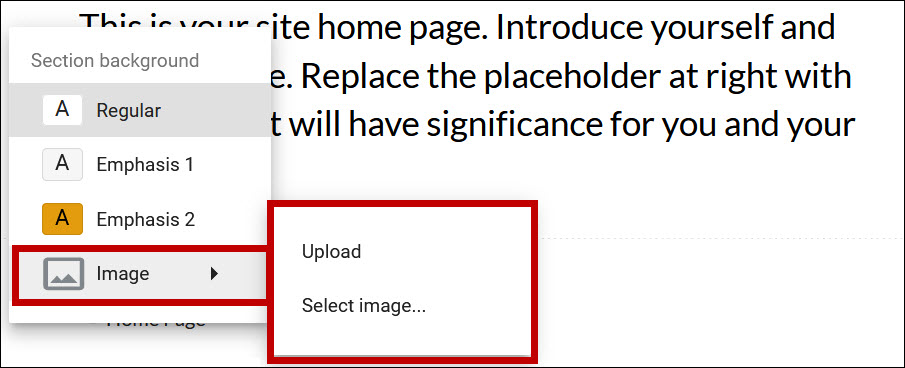
Choosing the Image option allows you to upload a picture from your computer or select an image from the web:
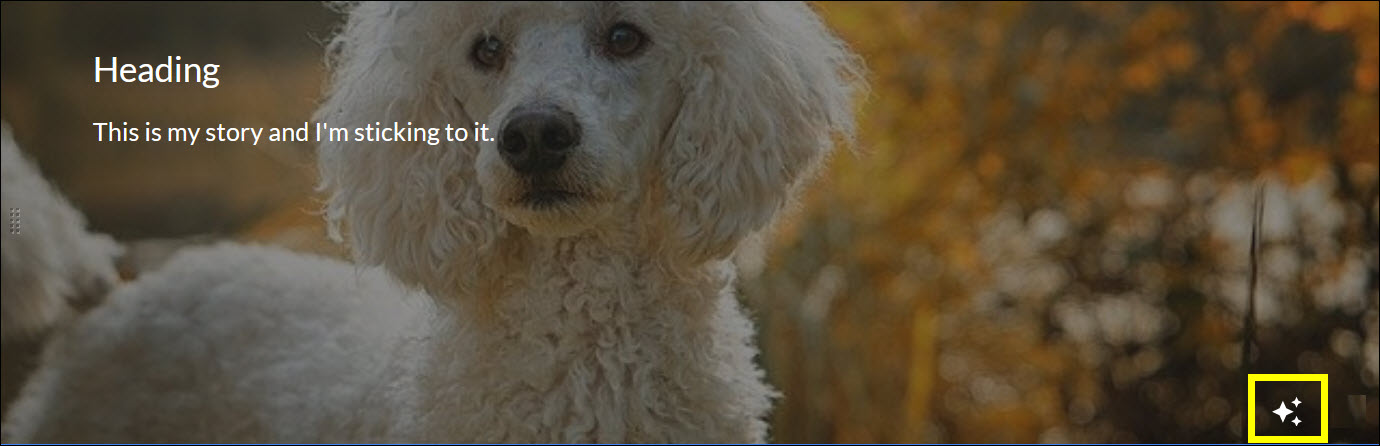
As you add an image, you'll notice a sparkling icon in the lower right corner that indicates that the colors in the image are being adjusted to increase readability. Generally, images are darkened to make the text stand out. To remove that adjustment, click on the icon. Caution: Text on top of images can be difficult to read. You may need to increase the font size to make text more readable or make other adjustments. Ask a friend to look at your site and give you honest feedback about its readability—you may love an image, but putting text over it may not work for visitors to your site.
(See Video #1 below.)


