Overview
The Test Score Information page (SOATEST) provides the ability to enter test scores into the Banner Information System.
The Raider Student Services determines who may enter test scores. If you wish to enter test scores and do not have the rights needed, please contact the Raider Student Services.
Accessing the Test Score Information Page
You may access the page using the Southern Oregon University menu or Search.
Accessing the Page Using the Southern Oregon University Menu
- Log into Banner.
- Click on the Applications icon
 on the left navigation bar.
 - Expand the Banner menu.
- Expand the Southern Oregon University menu.
- Expand the Faculty menu.
- Expand the Advising menu.
- Select Test Score Information (SOATEST).
Accessing the Transfer Articulation Advanced Standing Report Using Direct Access
- Log into Banner.
- Start Typing "test sc" into the Search box on the main Welcome screen.
- This will pull up a list of items that have "test sc" in the name. Select Test Score Information (SOATEST) from the list.
Entering/Viewing Test Score Records
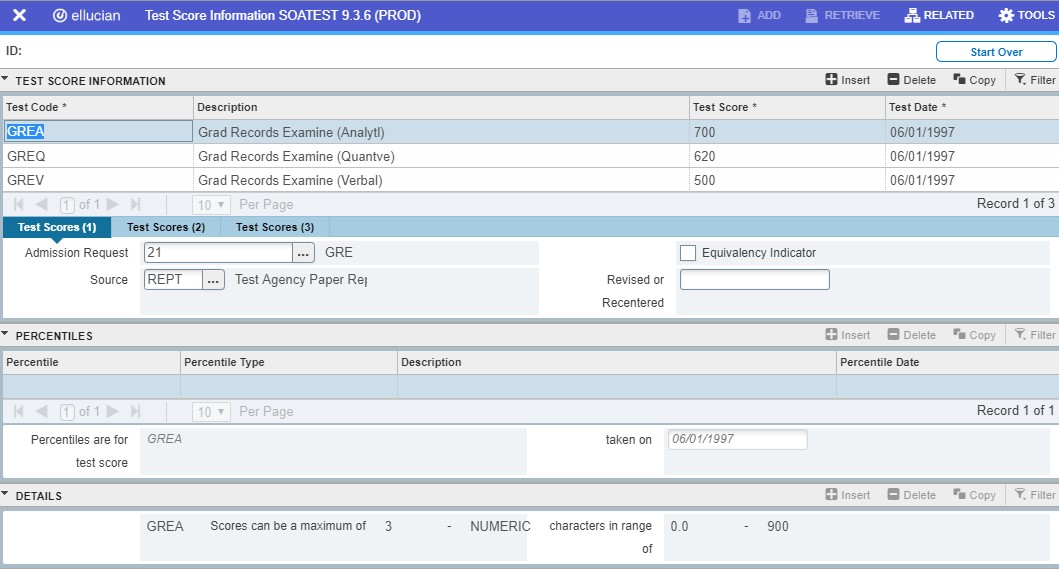
To enter or view a test score for a student, select the Test Score Information page (SOATEST). The Test Score Information form allows the entering/viewing of test scores on student accounts. The Test Score Information form is divided into four sections of data. The upper section (Key section) contains the "key" information to identify the student you wish to enter or view a test score for. The middle block (Test Scores Detail block) contains a list of the tests the student has taken. The lower block (Test Score Range block) displays the test score ranges for the record the cursor is on in the Test Scores Detail block.
Key Section (Page 1 - Section 1):
The Key section specifies which student you are working with. All fields in the Key block are required. Enter the following information:
Student ID: ID that identifies the student in Banner. Enter the ID of the student. If you do not know the ID, you may tab to the next field and enter a full or partial name or you may choose Help/List from the menu bar to do a search.
Student Name: Name associated with the student ID. If you have not entered an ID, enter the full or partial name of the student in the format of "Last, First". A % may be used as a wildcard (i.e., Enter Smith, Ja% to search for a student with the last name of Smith and a first name starting with the letters Ja).
Once you have successfully selected a student, choose Block/Next from the menu bar to move to the Test Scores Detail block or use the mouse to click into the block. Information will be displayed for the student entered in the Key block.
Test Scores Detail Block (Page 1 - Block 2):
The Test Scores Detail block displays a list of tests the student has taken. The Test Scores Detail block contains the following information:
Test Code: The test taken by the student. Choose Help/List from the menu bar to view valid codes. This field is required.
Test Score: Score student received for the test. The bottom of the form will show you the allowable range of scores for the selected test. This field is required.
Test Date: Date test was taken. The date must be in the format of DD-MON-YYYY. This field is required.
Admission Request: Admission checklist request code. This field will auto populate if the test is associated with an Admission checklist item. Do not change this value.
Source: Source of test score. Choose Help/List from the menu bar to view valid codes. This field is optional.
To enter a new test score, ensure that you have a blank record. If the record is not blank, choose Record/Insert from the menu bar to enter a new record. Enter all required information.
To update an existing record, use the scrollbar or the down and up arrow keys to move through the records until you locate the record you want to edit. Edit any fields as needed.
Choose File/Save from the menu bar to save any changes you have made. Choose File/Rollback from the menu bar to return to the top of the form. Choose File/Exit from the menu bar to exit the form. Remember to save any changes before doing a rollback or exiting the form.


